Fitness Video Shoot
Category : Equipment photographer photography products
This week Orcatek Productions shot videos and stills for 3G Cardio Fitness equipment.
Professional Phoenix Photographer
Category : Equipment photographer photography products
This week Orcatek Productions shot videos and stills for 3G Cardio Fitness equipment.
Category : Equipment photography products
This is the final part of my series on how to be a success as a photographer. In past blog articles I wrote about working with your clients, providing them with what they want and equipment choices. This week I am going to write about some more tools and training. I am going to assume you are working with a digital camera like me.
The worst thing any photographer can ever say is “No problem, I will fix it in Photoshop.” I can only wish every time a photographer says this they get a shocked by their camera – ZAP! Yes Photoshop is a great tool for photographers, but it should be used to enhance a good photograph. Removal of stray hairs or getting rid of blemishes are good uses for it. Even using the adobe color picker to airbrush out some background details is fine, but going overboard will make the photo look unrealistic. You need to get the shot right in the camera first or it’s like putting pants on a pig, it’s still a pig.
You may have noticed I said Photoshop. There are several other good programs available that you can also use such as Gimp or Paintshop. The challenge with these programs is when the time comes to share your work or even get training your options will be limited. In the end you will need a good program to retouch your images. Or you can hire a service to do this for you. This can be a good choice as you spend your time taking photos and not sitting in front of the computer.
The next question I get is, “What plug-ins should i buy?” Plug-ins are those add-ons to Photoshop that automate and add features. None are actually needed to do standard retouching. You can achieve what you need to do without them. Some are nice to have as you have revenues, as they can save time. If you must spend some money, I suggest looking at a sharpening tool and a skin softener. Learn to use them with a lite touch. You will hear the term selective / masking in Photoshop. You can download trials from almost every major vendor. It is a matter of tasted as to which works best for you.
Learn to create or find some actions to do your work. Actions are an automated series of steps in Photoshop that are processed very quickly. I have about four actions that I use daily which I have created. These are about fifteen to twenty steps long. What would take me over ten minutes to do manually, the action will do in about a minute. For example, I use an action to take a two page album spread and cut it into two images, adjusting the image for the gutter (area where pages come together in the center of the book) so the spread looks good when the book is opened.
If you can’t write your own actions, look on-line for them using one of your favorite search engines. One good action site is atncentral.com – Lots of free actions. Even if you don’t use them, you can see how they were constructed and learn some things about Photoshop can be used. Assign the ones you like use to function keys to save time when you want to run them. You can even use these in batch processes to do a hundred images at once – great for weddings.
Get some training on using Photoshop. Attend classes, get a book, read magazine articles, or even on-line. Lots of good free Photoshop videos are available on YouTube. Photoshop is very powerful and some basic training will go a long way towards learning how to use it. There are plenty of training facilities like Acuity Training, which offer hands-on practice for Photoshop and help in flexing your creative muscles.
Also, the one tool you should get is a graphic tablet, such as those made by Wacom. They make a small tablet that does everything a photographer needs – the Bamboo is about $80. It will save you huge amounts of time and improve accuracy once get used to using it. Later you may wish to upgrade to a larger one, but I have both and have found the small one is just as good or possibly better for my photo retouching work.
The other big time saver I cannot stress enough is learning the keyboard shortcuts in Photoshop. This will save you so much time you can’t imagine. It doesn’t take long to learn either. Here’s how you can learn them quickly. Each time you need to click on a tool or menu item, look at the short cut and then use it instead of clicking. The items which you use a lot you will learn in a very short period of time.
Once again I’ve gotten long a bit winded in this blog article. Feel free to drop me a line with any questions you might have. For those who are in the Phoenix area I do teach retouching with Photoshop.
Category : Cameras Equipment photography Rental Studio
This is part three on succeeding as a professional photographer. The question that I am always getting asked is what equipment and tools should I buy. “Canon, Nikon or Sony is coming out with a new whiz-bang gizmo, should I buy it?” In short, probably not. I am not going to recommend brands, because as long as you stick to the major manufacturers it doesn’t make a whole lot of difference in the long run.
First lets look at cameras. The body you choose depends a lot on what you will actually be shooting. If you are shooting action sports a camera with decent frame rate should be considered. Also read up on focus speed and focus tracking. Portraits are your primary business, then low light might be important, so look at noise levels for these images. In the end a lot of photographers choose a camera which does well in both areas, but isn’t the best at any. Another option is two cameras, one suited for each style.
Eventually you are going to need to have two cameras. As a professional you need to have a back-up available for emergency. In the beginning it may make sense to rent your back-up camera until revenues justify owning a second. Also remember your back-up does not need to be the same model as your primary. A lower end camera can work fine. Typically I rotate cameras from primary to back-up to sold. Last year’s model is often a great way to save.
Which brand of camera should you be using? If you know other photographers, using the same brand may be beneficial. You may have the ability to borrow a lens for flash in an emergency if you use the same gear. Also you will have someone to ask questions.
Lenses are another area of debate among photographers. A prime vs. a zoom is the one of the biggest questions. Primes will almost always give better results than zooms. But in the real world, it can be very difficult to tell the difference in a final print if you have good zooms. The most important thing is to buy good lenses. You will have them for a long time, whereas camera bodies in the digital world have become consumables unfortunately. Again, rent the specialty lenses as you need them. Owning a seldom used lens is a waste of precious money.
Lighting is the last key piece of equipment. Reflectors and bounce cards are your friend. Learn to use them and you will need fewer lights, saving money. If you are shooting outside the studio you need a good on camera flash. Lots of modifiers are available read reviews and get one you like, or make one. The ability to use your flash off of the camera will come in handy, so consider this as a future upgrade – brackets with cords or wireless remotes for longer distances.
In studio you can do a lot with as few as two lights, especially with the use of reflectors and a few good modifiers. Umbrellas are the lowest cost modifier, but softboxes tend to be the favorites among the pros. Get some decent stands and some sandbags to keep the lights from falling over. Once again look at wireless remotes, you can use cords to save some dollars, just be careful about tripping. Some lights have them built-in. This equipment can be rented too as needed when you are starting out.
Renting a whole studio for your shoots is a good idea when starting. A studio is a huge overhead with rent, utilities, alarms, insurance… Many studios rent to other photographers, and some cities have studios that only exist for rental purposes. Some rent equipment too making it every easier, albeit a bit more expensive.
Insurance is probably one of the most important areas that photographers will overlook. You need to not only insure all your equipment but also have general liability insurance protection. This can help you when you need financial assistance if any damage claims are alleged against you while working from your home studio. You may be able to add it to your home owner’s policy when you start out. Check as if you use your equipment for business, it is often excluded or requires a special rider.
The biggest equipment area to watch is spending. Don’t buy until you can justify with revenue. It is so easy to want the latest and greatest. Manufactures love to push this, but buy with caution. If you don’t manage your money, there will be no money to manage.
Next week I will continue this discussion and talk about computers, software and organizations.
Category : Equipment photography products Rental Studio
The Studio is officially open for business. We built the Studio so that photographers could rent a studio with the features to create amazing work without paying for all the flashy stuff that doesn’t pay the bills. With today’s tight economy, photographers need to watch their budgets very close. The Studio is the answer to their needs.
We have four primary shooting areas available for rent. Each bay was created to fit the varied needs of a photographer. Why rent what you don’t need. Of course if you need more we have that too.
The first bay is a large cyclorama which is 20×36. Plenty big for photographing cars and large groups. With two cove corners to allow the photographer to work with ease.
The second bay is a small cyclorama which is 18 feet wide. The bay extends back 23 feet. Perfect for fashion photography.
Bays three and four are what we call our standard bays. They are 18 feet wide and 23 feet deep. Bring your own backdrops or rent our seamless papers.
The bays can be draped off for privacy as needed.
Located on the Tempe / Scottsdale / Phoenix border, it is the perfect location.
It took a lot of time and effort to build The Studio, but it was worth it. We have already had photographers come in from Los Angeles and they said it was just what they needed – affordable quality and functionality. Exactly what we had in mind.
The Studio – Phoenix, Tempe, Scottsdale and the rest of Arizona
Category : Equipment photography
Studio construction continues as we race towards a May 1 completion. Painting is scheduled to begin Wednesday on the main studio. The lobby is scheduled for paint today. We could, of course, have opted for some peel and stick wallpaper to cover the walls, but for what we plan to use the space for the paint makes a little more sense. Still, something for a future project, perhaps?
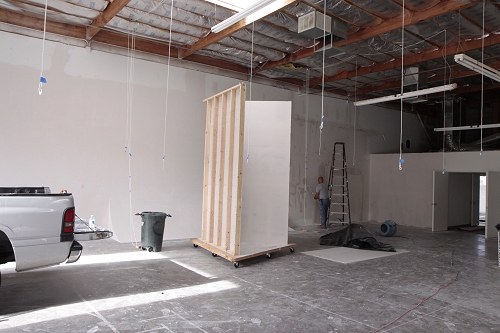
So many things to get done, power, internet, alarms, audio systems, new locks, moving equipment, new furniture, permits, etc. We also need to get in touch with a welder to finish off some of the metalwork in our new studio. A friend of ours is a welder and has just purchased some weldpro multi process welders for his welding company, so I might have to give him a call to see if he could help us. I cannot wait to see how everything comes together. This has been our most audacious construction project to date, truth be told. That being said, our construction project was made a lot easier through the use of construction project management software. Keeping on top of all the different tasks involved in a construction project is not always simple, but using software can make a big difference, as well as implementing the right safety practices during the construction stage. This is incredibly important in cases like these, we need to make sure that everyone involved is safe, that is why checking out a safety sign supplier in the UK/US was on our to do list, we needed to label everything just so we could hopefully avoid any injury, and we still hope we can. Slowly but surely it moves on. We have our first scheduled shoot for May 2, sure hope we are ready!
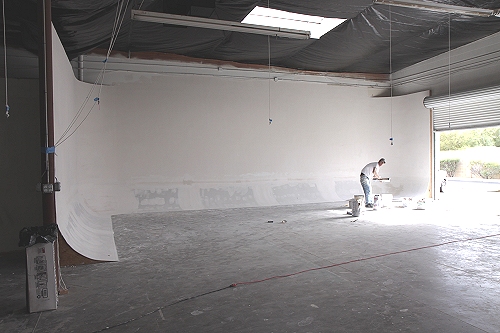
BTW, if you need a great drywall guy in Phoenix, message me and I can hook you up.
Category : Equipment photography Portraits
The new studio is still in progress with the build out, but I couldn’t resist testing out the skylights to see if they were going to be as nice as I had hoped. They were better than I had hoped. Simply set the camera up – ISO 400, F5.6, 1/60 and shoot away.
Lots of freedom of movement around the studio area as the pool of light is very large. The skylights themselves are 4×8 and about 21 feet above the floor. If you want to have a skylight dome for your studio or any other room, they would definitely be recommended due to the amazing lighting that they can offer.
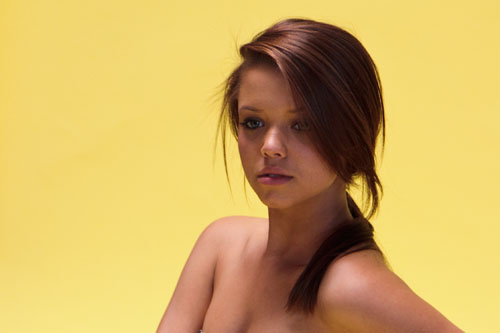
This sample shot is pretty much straight out of camera. I just cropped and reduced it in Photoshop.
We are still on schedule for a May 1 opening of The Studio. Back to the work to make sure everything gets done.
Category : Equipment photography products
Working on location with clients on location can be both fun and challenging. The resulting images though make it work the extra work required.
One of the biggest challenges faced when shooting on location is the lighting. Frequently these locations are outdoors so you have the sun to work with. Then comes the supplemental light needed to make the image come to life. Sometimes its reflectors, other times it is portable strobes. More often than not it is a combination. I personally like to use my speedlights as they are small and run on batteries.
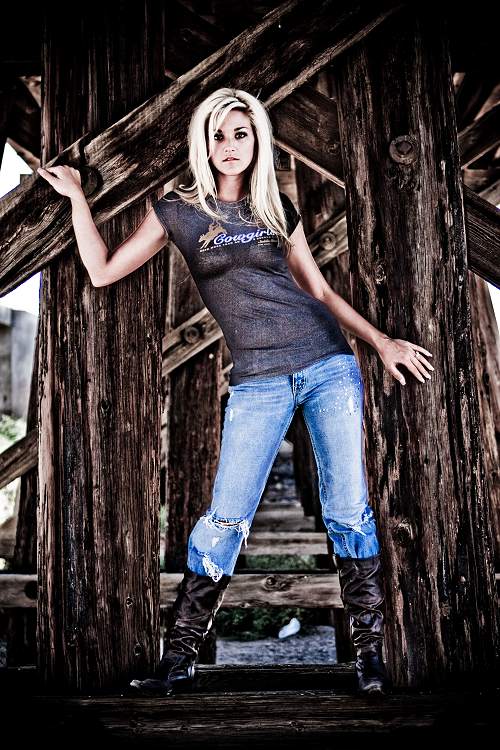
The Pocket Wizard company has come up with a new version of their product that really makes this work well. Radio Poppers has also been selling a product to provide very similar features, albeit in a very different way. The end result is wireless control of your flashes using full ETTL in environments where the built-in IR method was difficult if not impossible to use. Both these products really add to options for location photography.
Another challenge on location is permission. Phoenix requires a permit to shoot anywhere in town that is not private property. Private property owners control their property. The city is actually pretty easy to work with, and the permit is not expensive if you meet the requirements. Private property owners can be hit or miss. Some are great, others are huge corporations that you can’t even find a person to say “yes or no”.
Other cities are in the Phoenix area are not so clear cut. I have contacted most of them and they say no photographer permit for small shoots that I typically do. However I have had police and park rangers ask for my photography permits. I always tell them the truth; I was told I don’t need them. If they insist, I ask them where I get them. In any case, I still have been run off a few times, and on follow-up found that no permit was required. Better to take walk away on your own, then in handcuffs, so I prefer not to fight it too much.
So check the rules in your area. Get some portable light control. And produce some great location images.
Category : Cameras Equipment photography
This week I had the chance to work with a wide variety of clients, with all different needs. They all had one thing in common though; they wanted to look great and were nervous about getting their picture done.
The advantage of using a digital camera quickly becomes obvious. There are several major benefits to using a digital camera. It becomes a valuable tool in putting a client at ease.
First with the instant feed back you can show them instant feedback from the rear of the camera as to what the shots are looking like. Clients what to know that they are “doing it right” when giving them direction. By showing how good the photography looks, they can relax and make the pictures even better.
Second it allows for proofing during a shoot. When shooting a head shot I will shoot in batches. Shoot a batch review on a computer to either select a shot, or use as a point of discussion to discover what they like and tune the shoot to get the shot they desire. Very often when the client sees the shots on the computer they find that they like a pose that they had never considered.
And of course digital allows for quick deletion of those really bad shots where clients blink or anything else. This gives the client a much better set of proofs from which to select their photographs.
Lastly digital allows the photographer to capture more frames. The cost per frame is much lower than film. I find photographers in the digital age more willing to experiment, knowing that it is very cheap to do so.
I know digital has made my clients happier, and it has made me more productive.
Category : Automotive Cameras Equipment photography
I love January in Phoenix as it is the time of year when all the car auctions come to town. I enjoy the opportunity to see so many wonderful cars all gathered in one location. Last week I spent some time at Barrett-Jackson with my Canon 50D.
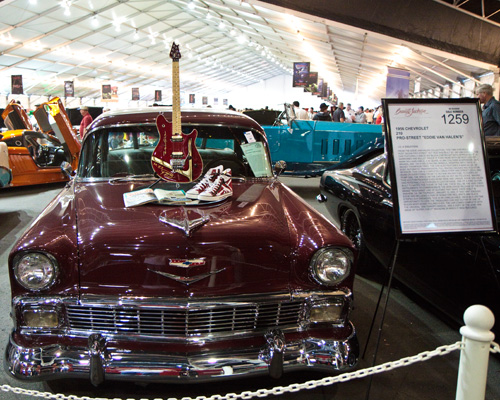
The lighting is all over the board at these auctions – full sun, open shade, tungsten, and mixed. I knew this would give the 50D a good chance to be tested. I had done some shooting with it outdoors and in studio, so I knew it worked well in these environments, but the indoor shots with random lighting seemed like it would be a challenge.
With prior cameras I would just crank up the ISO and shoot in AV mode keeping an eye on the shutter speed vs the focal length, tweaking the ISO where I could get away with it. The 50D now has an auto mode for ISO that I decided to get a test shooting the stage. As the cars move across the stage the lighting varies dramatically, and I wanted to get the cars in the clear, so I there was no one spot that they could be shot.
And not being a bidder, this meant I had to shoot from the cheap seats, so flash was out of the question. So I decided to switch the ISO to auto and see how the camera behaved. The ISO swung from 400 to 1250 depending on where I had the camera pointed and what aperture I selected. It kept the shutter speed within acceptable hand holding for the focal and length and never seemed to falter.
Upon reviewing the shots I was quite pleased with the results. Even though the noise level is acceptable for this type of work at the highest range the camera selected, it was nice to have even cleaner shots available when the light was better. I can really see where this feature can come in handy and why the Nikon users have always spoken so highly about the usefulness of this setting.
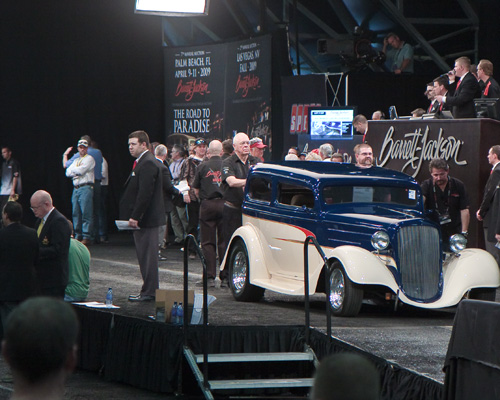
Auto-focus is also something I got a chance to test under the poor lighting and the 50D did great. I was very happy to see that it locked quickly and accurately under some tough conditions. The images were focused correctly and the camera only hunted when it faced the toughest targets where there was no contract to be seen. Experience has taught me to just focus on an edge and then recompose to the low contrast area as needed.
I will feel quite comfortable using the Canon 50D for this type of event in the future. Next week I hope to spend some time with my 5DII in the studio.
Category : Cameras Equipment photography
Every few months a new camera hits the market. Whether its a DSLR or even a home security camera for sale, cameras are very popular. The Canon fans are all going on about how the new super duper camera is the best thing. Then Nikon comes out with their new camera and “one ups” Canon. Back and forth it goes. The wonders of the digital age create new “must have” cameras constantly. You can purchase new camera equipment over at the Edmund Optics website.
More pixels, gotta have more pixels, at least 50 megapixels. No you fool, the only thing that counts is sensor size. Must be full frame. Are you kidding, noise is what counts. You have to have no visible noise at ISO 53200. Wrong again, its dynamic range that counts, you have to have 24-bits. You know your eyes can’t see that well, but it helps it post processing.
Hey wait, let us do video too. Video at full resolution, not this crappy HD stuff they are pushing now. You must have 30fps at full resolution and you will have the ultimate sports camera. You will never miss a shot and leave your competition in the dust.
The cure for bad photographer is a better camera. The reason you don’t get those great shots is your camera. It must be the problem. If you had a better camera you could have gotten that shot, but your camera just couldn’t cut it. Next year you will get a new camera and your photographs will get so good. It doesn’t have to cost you the earth to keep yourself up to date either, as you can wait a little while then just buy them secondhand from places like https://www.shoppok.com. So many people forget that this is an option, and it can save you a lot of money.
Ultimately, there is no denying that there is so much choice out there that deciding which camera is best for your needs can seem overwhelming. That being said, it is important to remember that there are some fantastic online review websites like Buyersimpact.co.uk that can make deciding which camera to buy a little easier. Whenever I need any new camera equipment I always like to read through plenty of reviews first to make sure that I am making the right choice. It is no secret that camera equipment can be expensive and so reading reviews about the products that interest you can help you to decide how to spend your money.
But what about those other photographers using their 4+ year old camera bodies that keep winning awards. How do they do it? I’ve even seen award winning photographs taken with a camera phone. It must all be Photoshop. They are using all kinds of expensive plug-ins and fancy techniques that take thousands of dollars and hundreds of hours to create those photographs. You know, you’ve seen them in magazines. They do magic.
So do you really need a new camera to be a better photographer? Is that the solution? Nikon, Canon, Sony and the rest want you to think so. After all, that’s how they make their money. How do you make yours? I make mine taking photographs.